We  Open Source
A community education resource
Getting started with Etcher.io
Try this open source utility that makes it easy to create bootable media.
Do you need a great solution for creating bootable USB drives? There are some Linux distributions like Fedora that make it easy to create bootable media that make it easy to try Linux. Most other distributions provide the ISO or image files and leave the media creation up to the user. Many of us have used dd and created media on the command line, but let’s face it, even for the most experienced user, that’s still a pain. Other utilities like UnetBootIn, Disk Utility on MacOS, and Win32DiskImager on Windows can create these drives.
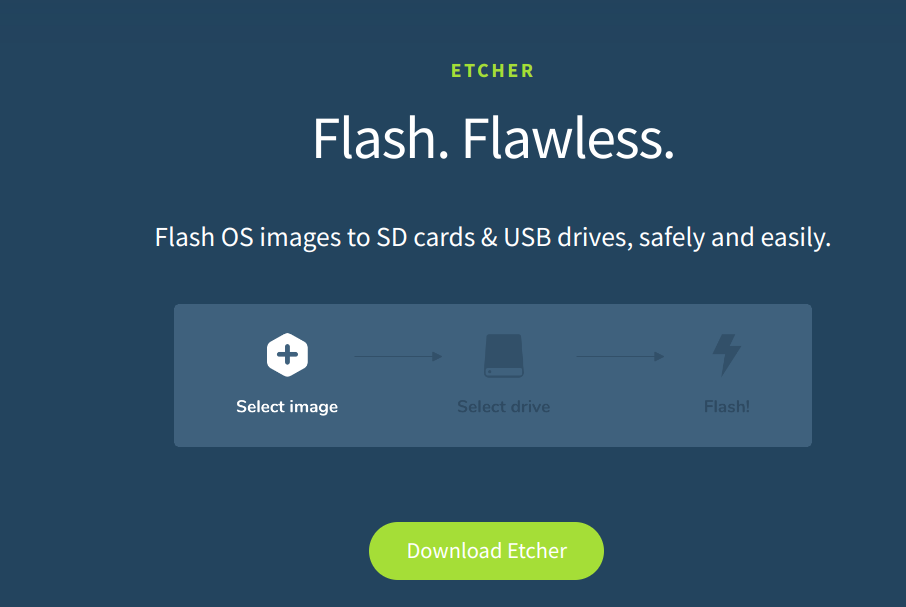
A few years back, I stumbled upon a remarkable open source project that simplifies media creation on any of the platforms mentioned earlier. Etcher.io has streamlined the process and become my preferred application for creating bootable media for Linux. I can effortlessly download ISO and ‘burn’ them to flash drives and SD cards. Etcher is compatible with Linux, Windows, and MacOS, offering a straightforward approach to media creation.
Go to the Etcher.io website and select the download link. Etcher is available for 32/64-bit Linux, 32/64-bit Windows, and MacOS. It is an open source project licensed under Apache 2.0 and the source code is available on GitHub.
Besides creating bootable images for Ubuntu, LinuxMint, Fedora, and others, I have used Etcher to create SD card images for the Raspberry Pi. Etcher provides great instructions in its GitHub repository for adding Etcher to your own collection of Linux utilities.
The project provides complete documentation detailing how to install Etcher depending on your particular operating system.
Once you have Etcher installed, download the ISO or image you wish to install on the USB or SD card and then launch Etcher and insert your media into the computer.

Click on ‘Select image.’ In this case, I am going to create a bootable drive to install LinuxMint onto a new system. Once I have selected the correct image file and my install media is inserted into the computer, Etcher.io ‘sees’ the drive, and I am ready to begin the installation process.
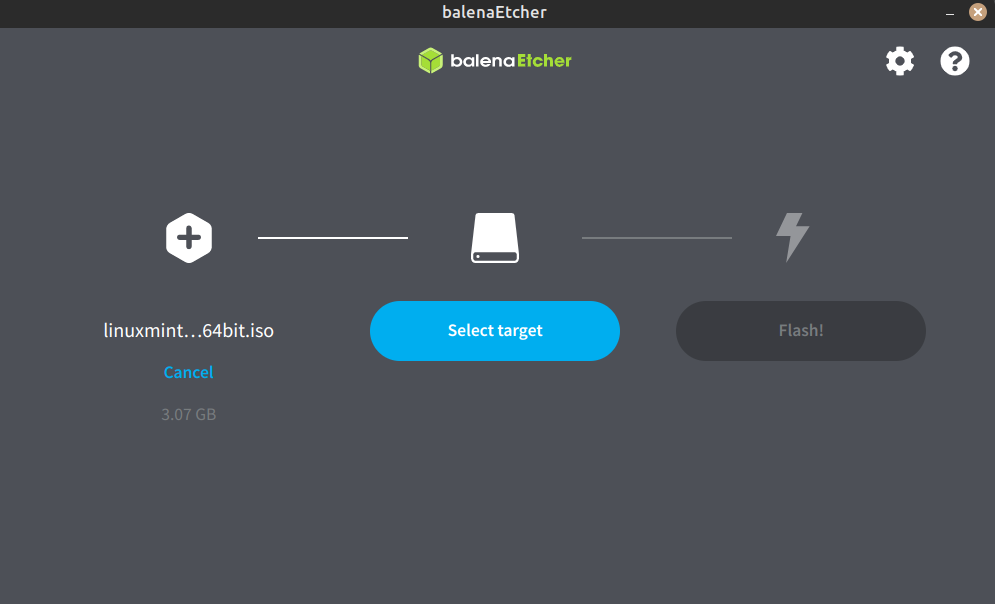
At this point, I select the target ‘click’ on ‘Flash,’ and the installation process begins. The time required for installation can vary depending on the size of the installation, your processor speed, and installed memory. After the image is installed on the drive, the software verifies the installation, and at the end of the process, a banner is displayed announcing that my media creation is complete.
The documentation for Etcher is excellent. I have found Etcher very easy to use and it has replaced my need to use other products, none of which accomplish the media creation I need as easily as Etcher.

The opinions expressed on this website are those of each author, not of the author's employer or All Things Open/We Love Open Source.
Contribute to We Open Source
Help educate our community by contributing a blog post, tutorial, or how-to.