We ❤️ Open Source
A community education resource
Getting started with Upscayl tutorial
Powered by open source artificial intelligence, Upscayl can enhance low-resolution images.

My fascination with photography traces back to my childhood when I hijacked my father’s Kodak 620 camera to capture the wonders of nature in our neighborhood. This early passion evolved through high school with an Instamatic camera and, later, with the advent of digital cameras in the late 1990s. While early digital models offered convenience and instant sharing, they fell short of the richness and depth of traditional film photography. Despite significant advancements in digital imaging, older digital photographs often need to be improved on modern screens.
For years, my solution for enhancing digital images was the versatile tool GIMP. However, a few years back, I encountered a challenge while attempting to upscale a vintage thumbnail image of my father from the 1940s using GIMP. Although it managed the task, the result needed more detail and clarity.
Then I found Upscayl, a revelation in the realm of image upscaling. This free and open source software, powered by open source artificial intelligence (AI), has transformed how I enhance low-resolution images.
Discovering Upscayl
Upscayl is compatible with Linux, Windows, and macOS platforms. For more information, consult the ‘Installation‘ section of the project’s Github repository. You can install the application on Linux using Flatpak or Snap.
Getting started with Upscayl
Once installed, you can immediately enhance your images with Upscayl’s intuitive graphical user interface. The software breathes new life into old images, rendering them with resolutions surpassing the originals. Additionally, batch processing allows for upscaling entire image collections or albums simultaneously.
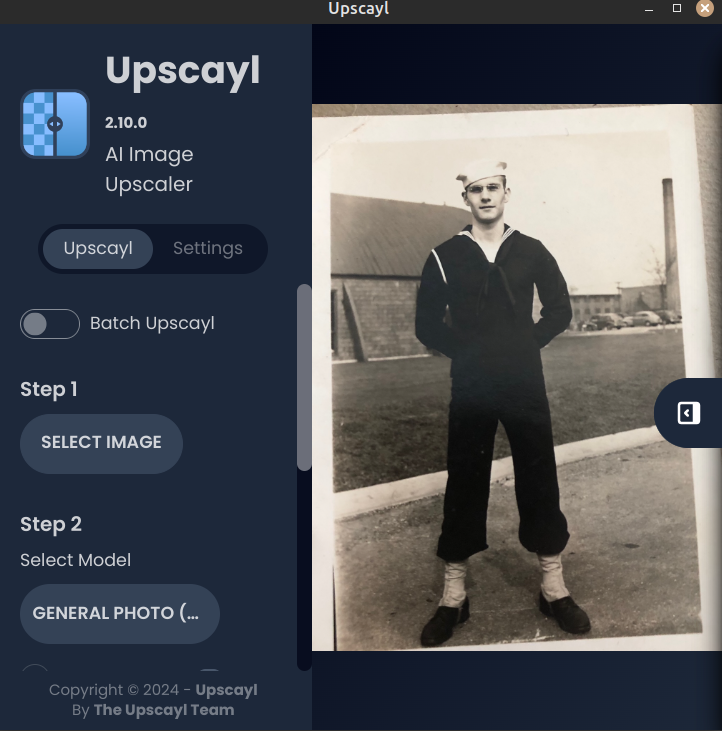
Launch the software and select your desired image or folder of images to begin. Then, choose from six upscaling options, including specialized ones for digital art. After selecting the preferred upscaling method, designate the output directory for the enhanced images. Finally, initiate the upscaling process by clicking the Upscayl button. The conversion speed varies depending on your GPU and the chosen output specifications.

Select the image, select the AI model to be used for the upscaling, and then select the output folder. The upscaling process speed will depend on your computer’s CPU and GPU. Upscayl supports a large number of image upscaling models.
My original image, which was scanned, came from a picture in an old scrapbook and would have been nearly impossible to render meaningfully for a veterans commemorative display poster. The original image was approximately 2 inches by 3 inches and was taken with a black-and-white camera in 1945.
Images can be upscaled by from the original size to 1x, 2x, 3x or 4x. I chose to increase the image size from its original 1152 x 1528 to 2304 x 3056. Images can be saved as png, jpg, or webp. The Upscayl project maintains a wiki with helpful documentation and is open source with a AGPL v.3 license.
The opinions expressed on this website are those of each author, not of the author's employer or All Things Open/We Love Open Source.
