We ❤️ Open Source
A community education resource
4 open source documentation tools for developers
Try these simple tools and tips for documenting your open source project.

An often-overlooked area in open source software projects is documentation. It’s easy to look at open source as providing innovative new programs that solve interesting problems, ready to download, build, and use. By sharing everything under an open source license, anyone can study the source code and make changes.
But using a new program or application can be difficult if the project doesn’t include documentation to explain what it does or how to use it. It’s even more difficult to attract new developers to contribute to the project without documentation to explain how the program is designed or how to build it.
Open source projects need documentation too. This documentation doesn’t need to be professional-grade, with perfect formatting and every comma in the right place. Just getting something out there in an accessible format is often enough to help others get on board and start using the application. Here are a few common writing technologies and tools you can use to document your open source project.
HTML
The great thing about writing documentation in HTML is that you can immediately view it in a web browser. HTML has just a few basic rules, which makes it fairly straightforward to learn: Formatting is controlled by tags, and tags use angle brackets, like <p>. If you “open” a tag, you also need to “close” it, like <p>..</p>. Tags are either block (like headings and paragraphs) or inline (like bold or italic text)
HTML is a big topic and it’s easy to get distracted with all the tags and formatting available to you. When writing documentation in HTML, keep it simple and start with these basic formatting tags:
<h1>..</h1>for top-level headings, like the title of your document<h2>..</h2>for section headings, like “What is __” and “How to build”<p>..</p>for paragraphs<strong>..</strong>for strong emphasis, such as a warning<em>..</em>to add regular emphasis<code>..</code>for in-line code, like what you’d include in a sentence<pre><code>..</code></pre>for blocks of code samples, such as to show how the code works or to demonstrate the output of a program
HTML documents have a fairly straightforward syntax:
<!DOCTYPE html>to define the document type as HTML<html>to start the document<head>for meta-data about the document, such as the title<body>to contain the main body of the document
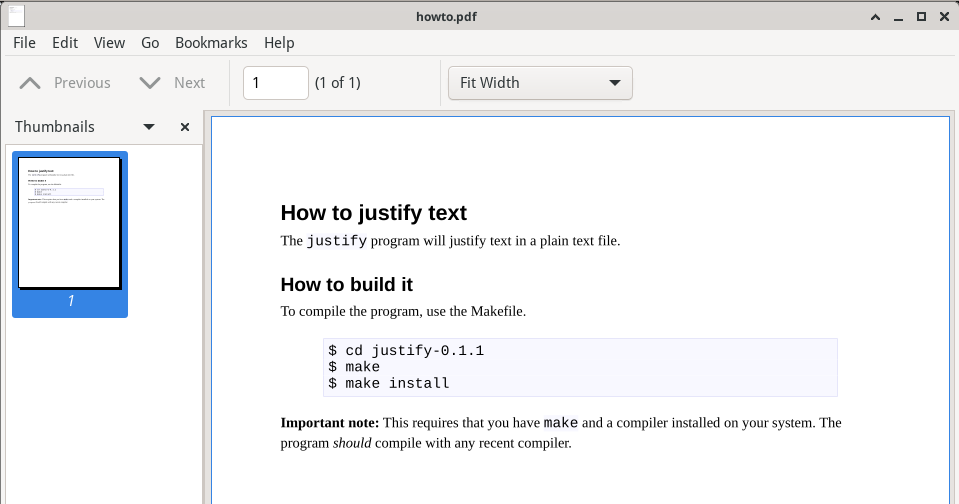
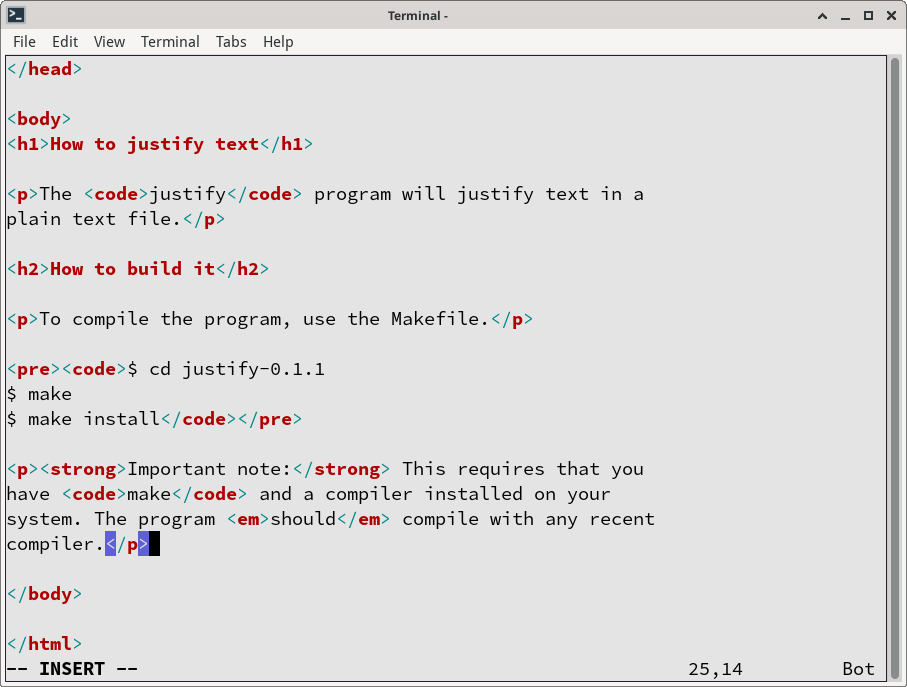
Here’s an example that shows how to write a simple document in HTML, and what it looks like in a web browser:
<!DOCTYPE html>
<html>

<head>
<title>How to justify text</title>
</head>

<body>
<h1>How to justify text</h1>

<p>The <code>justify</code> program will justify text in a
plain text file.</p>

<h2>How to build it</h2>

<p>To compile the program, use the Makefile.</p>

<pre><code>$ cd justify-0.1.1
$ make
$ make install</code></pre>

<p><strong>Important note:</strong> This requires that you
have <code>make</code> and a compiler installed on your
system. The program <em>should</em> compile with any recent
compiler.</p>

</body>

</html>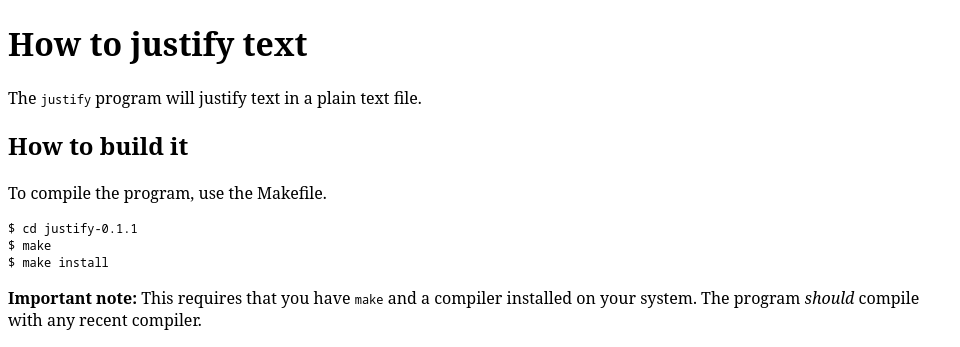
Read more: Getting started with Streamlit
Markdown
What I love about Markdown as a minimal markup system is that it lets me focus on my content without worrying about the markup to get there. Markdown was created to take advantage of the standard conventions for writing documentation in plain text: For example, to start a new paragraph, just add a blank line. Or to write a list, just start each line with a number (to create an ordered list) or a dash (to create an unordered list).
Documents usually start with a title or top-level heading. Even as far back as the 1980s and 1990s, developers would often write a title with a row of “equal” signs under the text, to suggest a “double underline.” Similarly, developers might write a subheading with a row of dashes to suggest a “single underline.” Markdown formats these as headings and subheadings:
Read me first
=============

About the program...

How to install
--------------

How to install it...
To format text in italics, put a _single underline_ around the word or phrase. To format text as bold, use **two asterisks** around the word or phrase. Markdown also accepts a *single asterisk* for italics and __two underlines__ for bold text.
To write inline code, use a single backtick around the word or phrase. Writing blocks of sample code uses a “fence” of these backticks: type three backticks to start a code block, and three backticks to end a block.
Markdown is also supported by default in GitHub, which makes it an easy add-on for writing project documentation. Here’s a simple example of writing documentation in Markdown, plus what it looks like when rendered on GitHub:
How to justify text
===================

The `justify` program will justify text in a plain text file.

How to build it
---------------

To compile the program, use the Makefile.

```
$ cd justify-0.1.1
$ make
$ make install
```

**Important note:** This requires that you have `make` and a compiler
installed on your system. The program *should* compile with any recent
compiler.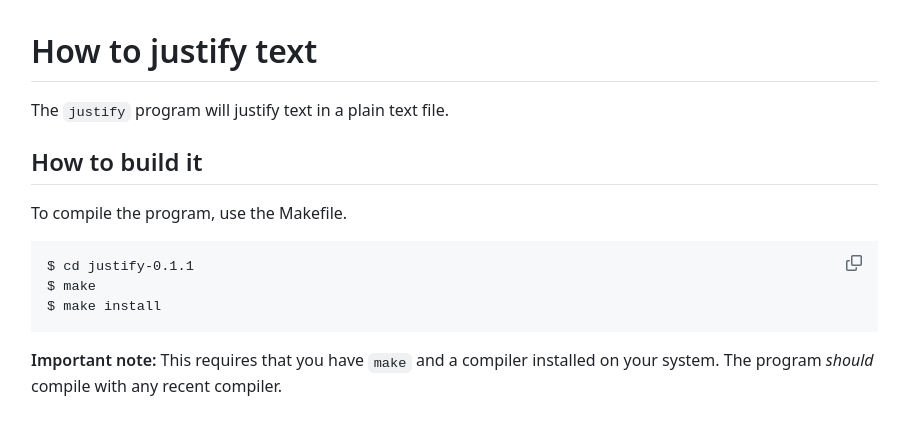
Read more: Seamlessly convert Markdown documents to Office formats with Pandoc
LibreOffice
If you need to create documentation in PDF format, I recommend LibreOffice Writer. A desktop word processor like LibreOffice provides fine control over formatting, which makes it easy to create professional looking documents.
I find the best way to use LibreOffice to write documentation is to use styles for everything and let the styles do the work. Use the Styles > Manage Styles menu, or press F11 on your keyboard (the hot key for Manage Styles) and you’ll get a style selector that provides access to all of the styles. Highlight text in your document, then double-click on a style from the menu to apply it. To modify the appearance, right-click on a style and select Edit Style.. in the pop-up menu to bring up a dialog with options:
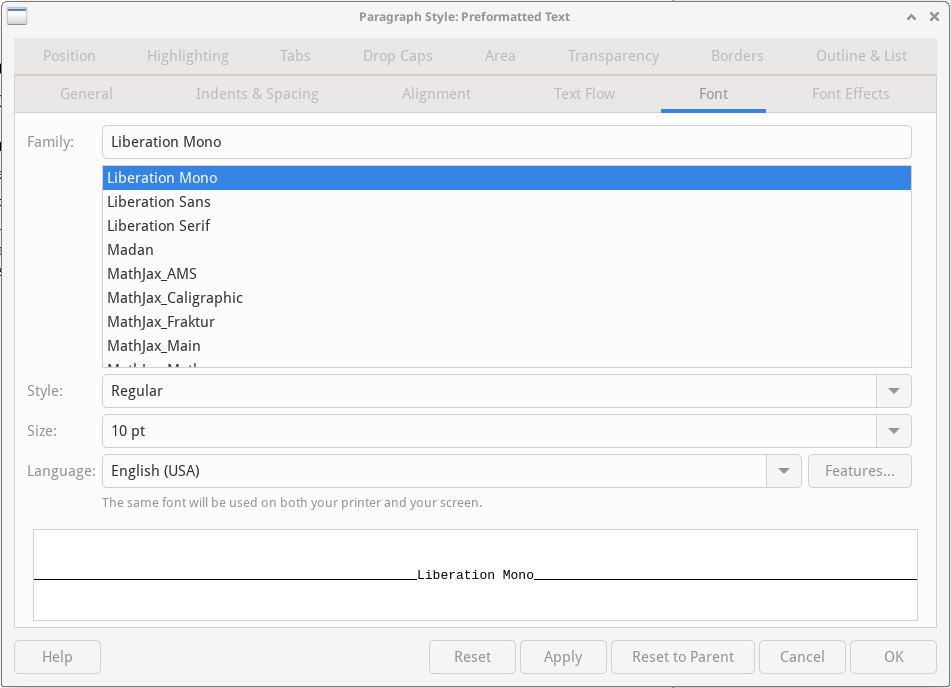
Use the Paragraph Styles for block-level styles like headings, paragraphs, and preformatted text. Instead of using the B and I buttons on the toolbar for bold and italic text (or ctrl-B and ctrl-I keyboard shortcuts) use the Character Styles instead, like Strong Emphasis and Emphasis to draw the reader’s attention, Source Text for inline code, or Teletype for commands and sample output.
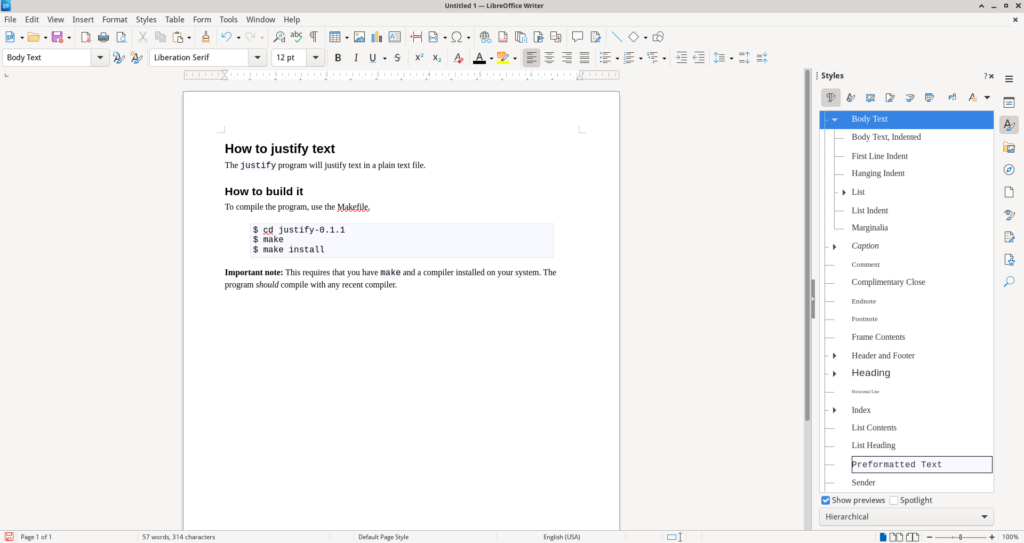
Here’s an example of writing documentation in LibreOffice Writer, and the PDF output:
Read more: 5 simple ways to help open source projects without writing code
Vim
I like using Vim, the VI iMproved editor. It’s available everywhere, and is included by default on most Linux server distributions. This makes it easy to use Vim to edit files on remote systems over an ssh connection, such as editing HTML documentation on your project’s website. With Vim, editing a file is just a keystroke away.
Vim is based on the original vi editor, so the keyboard commands might be different than what you’re used to in other editors. Fortunately, you only need to know a few keyboard commands to be effective in Vim:
- In general, you will either be in command mode where you type a character or give a longer command, or edit mode where you enter text.
- Use
/to search for text. This also positions your cursor at the start of the next occurrence of whatever you searched for. - Type
cwto change a word. This puts you in edit mode, so press the Esc key when you’re done typing to return to command mode. - Use the arrow keys to move through the file, and type
ato append text after the current character, orAto append text at the end of the current line. Similarly, useito insert text before the current character, orIto insert text at the start of the current line. Hit theEsckey when you’re done typing to go back to command mode. - To save your work, press
Escto go to command mode, then type:wto write the file.When you’re done editing, pressEscfor command mode, then type:qto quit your Vim session.
More from We Love Open Source
- 5 FreeDOS editors I love
- Getting started with Streamlit
- 5 simple ways to help open source projects without writing code
- Seamlessly convert Markdown documents to Office formats with Pandoc: A how-to guide
- Automatically generate beautifully styled PDF files for contracts, approval notices, and project orders

The opinions expressed on this website are those of each author, not of the author's employer or All Things Open/We Love Open Source.