We ❤️ Open Source
A community education resource
4 ways to extend your local AI co-pilot framework
Extend the framework of your AI co-pilot tools to fit your personal needs.

Welcome to the second part of this tutorial on extending your framework. Once you’re off the ground with the basic setup (part one of this tutorial), there are lots of great ways to extend the framework to fit your personal needs.
Setting up custom commands
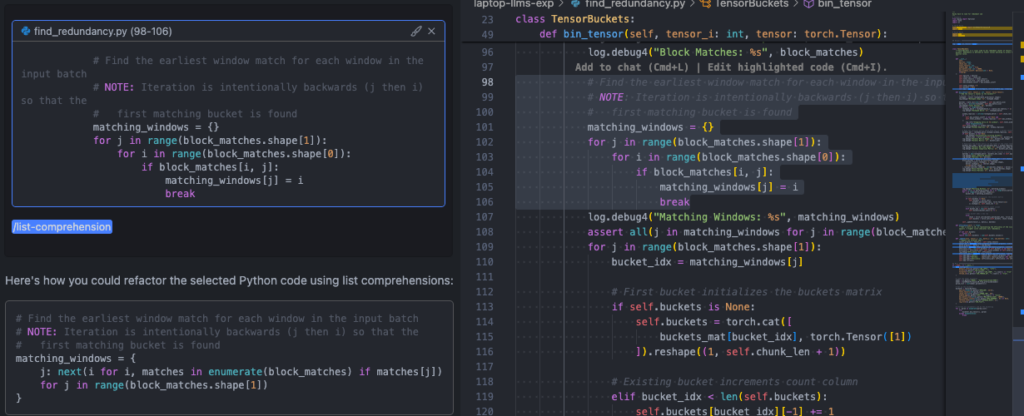
One of the great features of continue is the ability to develop your own prompt-engineered commands. This can all be done in the "customCommands" section of the core config.json.
As an example, I created the /list-comprehension command to help with refactoring python code to use list/dict comprehensions wherever possible:
  "customCommands": [
   ...
   {
     "name": "list-comprehension",
     "prompt": "{{{ input }}}\n\nRefactor the selected python code to use list comprehensions wherever possible. Present the output as a python code snippet.",
     "description": "Refactor to use list comprehensions"
   }
 ]
You can then call your custom command from the chat window by selecting code and adding it to the context with Ctrl/Cmd-L, followed by invoking your command (/list-comprehension).
Experimenting with different models
Another nice feature of continue is the ability to easily toggle between different models in the chat panel. You can configure this using the "models" section of the core config.json. For me, this was useful to experiment with the difference between the various sizes in the Granite Code family.
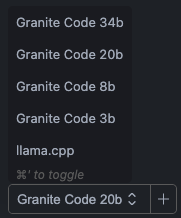
To set this up, you simply have to add additional entries in the "models" list:
  "models": [
   {
     "title": "Granite Code 34b",
     "provider": "ollama",
     "model": "granite-code:34b"
   },
   {
     "title": "Granite Code 20b",
     "provider": "ollama",
     "model": "granite-code:20b"
   },
   {
     "title": "Granite Code 8b",
     "provider": "ollama",
     "model": "granite-code:8b"
   },
   {
     "title": "Granite Code 3b",
     "provider": "ollama",
     "model": "granite-code:3b"
   }
 ],
Here are some other models on ollama that may be worth trying out. Many of these models do not have standard open source licenses, but may be worth experimenting with:
| Model | Sizes | License | Link |
|---|---|---|---|
| llama 3 | 8B, 70B | META LLAMA 3 | https://ollama.com/library/llama3 |
| codellama | 7B, 13B, 34B, 70B | LLAMA 2 | https://ollama.com/library/codellama |
| deepseek-coder-v2 | 16B, 236B | DEEPSEEK | https://ollama.com/library/deepseek-coder-v2 |
| codegemma | 2B, 7B | Gemma | https://ollama.com/library/codegemma |
| starcoder2 | 3B, 7B, 15B | BigCode Open RAIL-M v1 | https://ollama.com/library/starcoder2 |
| codestral | 22B | Mistral | https://github.com/open-assistant/codestral |
Read more from We Love Open Source: Getting started with Llamafile tutorial
Managing ollama serve
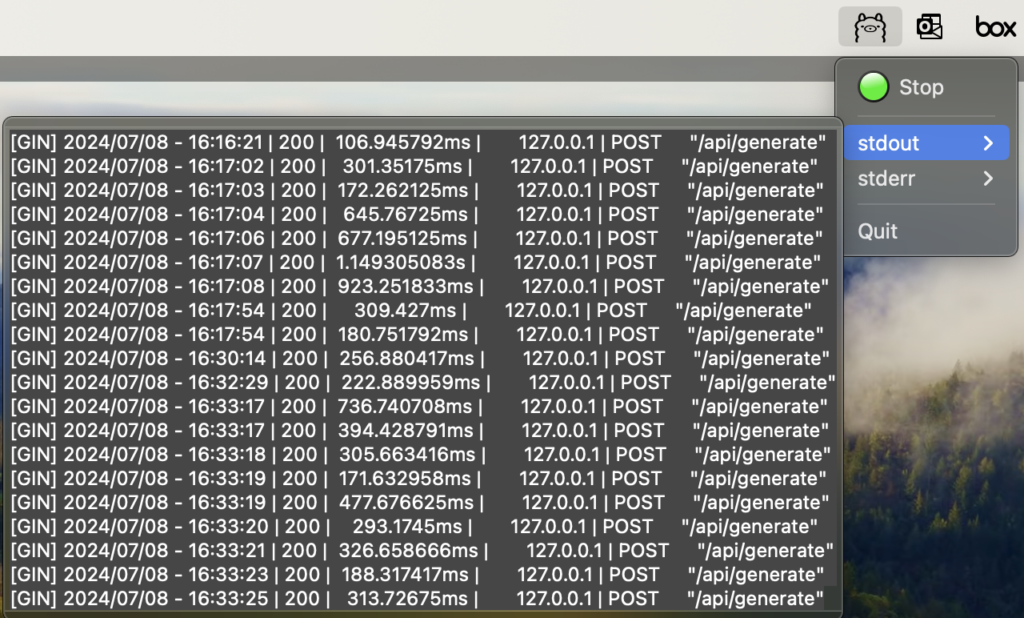
One of the things that caused some concern with this setup is the need to manage a global ollama serve process. I work on many different projects, each with its own VS Code instance and local terminals, so launching ollama serve from a single project’s terminal felt unnatural and often required me to hunt-and-peck through all of my workspaces to figure out where I’d launched it.
To solve this, I took a detour into macOS application development (which is waaay outside my wheelhouse!) For me, one of the beauties of the ollama interface is its similarity to docker, so naturally, I wanted to extend the similarities to match the ease of Docker Desktop / Rancher Desktop / Podman Desktop, all of which provide a convenient menu-bar app to manage the global server process. While not nearly as feature-rich as these ecosystems, the ollama-bar tool I built makes it seamless to manage a single instance of ollama serve from your menu bar.
To set up ollama-bar as a desktop app, you can build it from source:
git clone git@github.com:IBM/ollama-bar.git
cd ollama-bar

# Build and install the app in /Applications
make install-app

# Open the app
open /Applications/ollama-bar.app
You can also set the app up to launch on login:
- Open System Settings.
- Go to General > Login Items.
- Under Open at Login, click the
+icon. - Select /Applications/ollama-bar and click Open.
Import local models
While the ollama library is a great tool to manage your models, many of us also have numerous model files already downloaded on our machines that we don’t want to duplicate. The ollama Modelfile is a powerful tool that can be used to create customized model setups by deriving from known models and customizing the inference parameters, including the ability to add (Q)LoRA Adapters (see the docs for more details).
For our purpose, we only need the simple FROM statement, which can point to a known model in the ollama library or a local file on disk. This makes it really easy to wrap the process into an import-to-ollama bash script:
#!/usr/bin/env bash

file_path=""
model_name=""
model_label="local"
while [[ $# -gt 0 ]]
do
   key="$1"

   case $key in
       -f|--file)
           file_path="$2"
           shift
           ;;
       -m|--model-name)
           model_name="$2"
           shift
           ;;
       -l|--model-label)
           model_label="$2"
           shift
           ;;
       *)
           echo "Unknown option: $key"
           exit 1
           ;;
   esac
   shift
done

if [ "$file_path" == "" ]
then
   echo "Missing required argument -f|--file"
   exit 1
fi
file_path="$(realpath $file_path)"

# Check if model_name is empty and assign file name as model_name if true
if [ "$model_name" == "" ]
then
   model_name=$(basename $file_path)
   model_name="${model_name%.*}"
fi

# Append the model label to the model name
model_name="$model_name:$model_label"
echo "model_name: $model_name"

# Create a temporary directory for working
tempdir=$(mktemp -d)
echo "Working Dir: $tempdir"

# Write the file path to Modelfile in the temporary directory
echo "FROM $file_path" > $tempdir/Modelfile

# Import the model using ollama create command
echo "importing model $model_name"
ollama create $model_name -f $tempdir/Modelfile
Local Large Language Model (LLM) web user interface
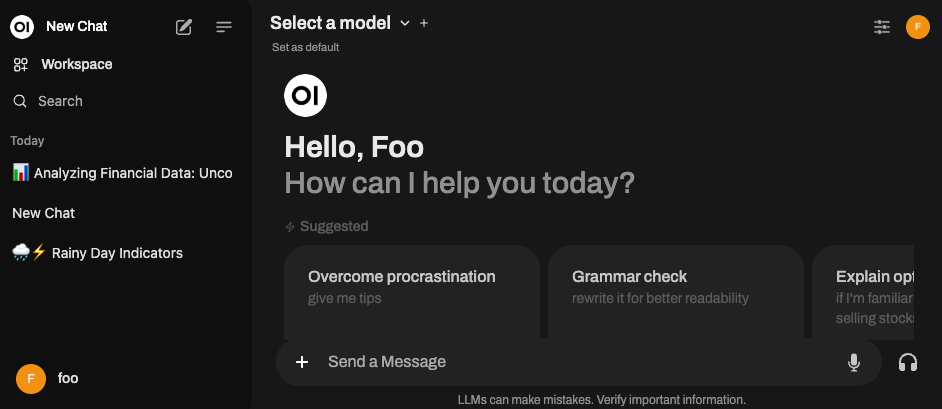
There are numerous additional AI applications, use cases, and patterns that can be adapted to work with local Large Language Models (LLMs). Exploring LLMs locally can be greatly accelerated with a local web user interface (UI). The Open WebUI project (spawned out of ollama originally) works seamlessly with ollama to provide a web-based LLM workspace for experimenting with prompt engineering, retrieval augmented generation (RAG), and tool use.
To set up Open WebUI, follow the steps in their documentation. The simplest versions are:
Docker
docker run -d -p 3000:8080 --add-host=host.docker.internal:host-gateway -v open-webui:/app/backend/data --name open-webui --restart always ghcr.io/open-webui/open-webui:mainPip
pip install open-webui
open-webui serve
Once running, you can open the UI at http://localhost:8080.
open http://localhost:8080The first time you log in, you’ll need to set up an “account.” Since this entirely local, you can fill in garbage values (foo@bar.com/asdf) and be off to the races!
Next steps
- Read part one of this tutorial series on We Love Open Source: Build a local AI co-pilot using IBM Granite Code, Ollama, and Continue.
- Explore more articles and tutorials about watsonx on IBM Developer.
- Read more from We Love Open Source: Getting started with Llamafile tutorial
This article is adapted from “Build a local AI co-pilot using IBM Granite Code, Ollama, and Continue” by Gabe Goodhart, and is republished with permission from the author.

The opinions expressed on this website are those of each author, not of the author's employer or All Things Open/We Love Open Source.