We ❤️ Open Source
A community education resource
Getting started with the ‘ed’ editor
Learn how to add lines to a file, search for text, update and edit text, append and insert new lines, save, and quit.
These days, we have lots of ways to edit text files, depending on your preference. For example, you might use an Integrated Development Environment (IDE) to write programs and edit files. Or you might edit files directly in your web browser, such as editing Markdown documentation using the GitHub web editor. For simple edits, you might use the plain text editor that’s provided by your desktop environment such as GNOME’s Text Editor, Xfce’s Mousepad, or KDE’s Kate. These are examples of graphical editors that operate in a graphical desktop environment.
If you’re a little more “old school,” you might use Emacs or Vim to edit files. Both can run in graphical environments, but you can also use them in terminal mode, such as running Vim in a terminal window. These are also called screen-based editors that use screen addressing to position text on the screen.
But have you ever wondered how did they edit text before that? Let’s explore a bit of computing history with the ed editor. If you’d like to follow along and don’t have ed on your system, you should be able to install it using your Linux system’s package manager:
$ dnf install edYou can compile ed for yourself by downloading it from the GNU ‘ed’ website.
Plain text and slow
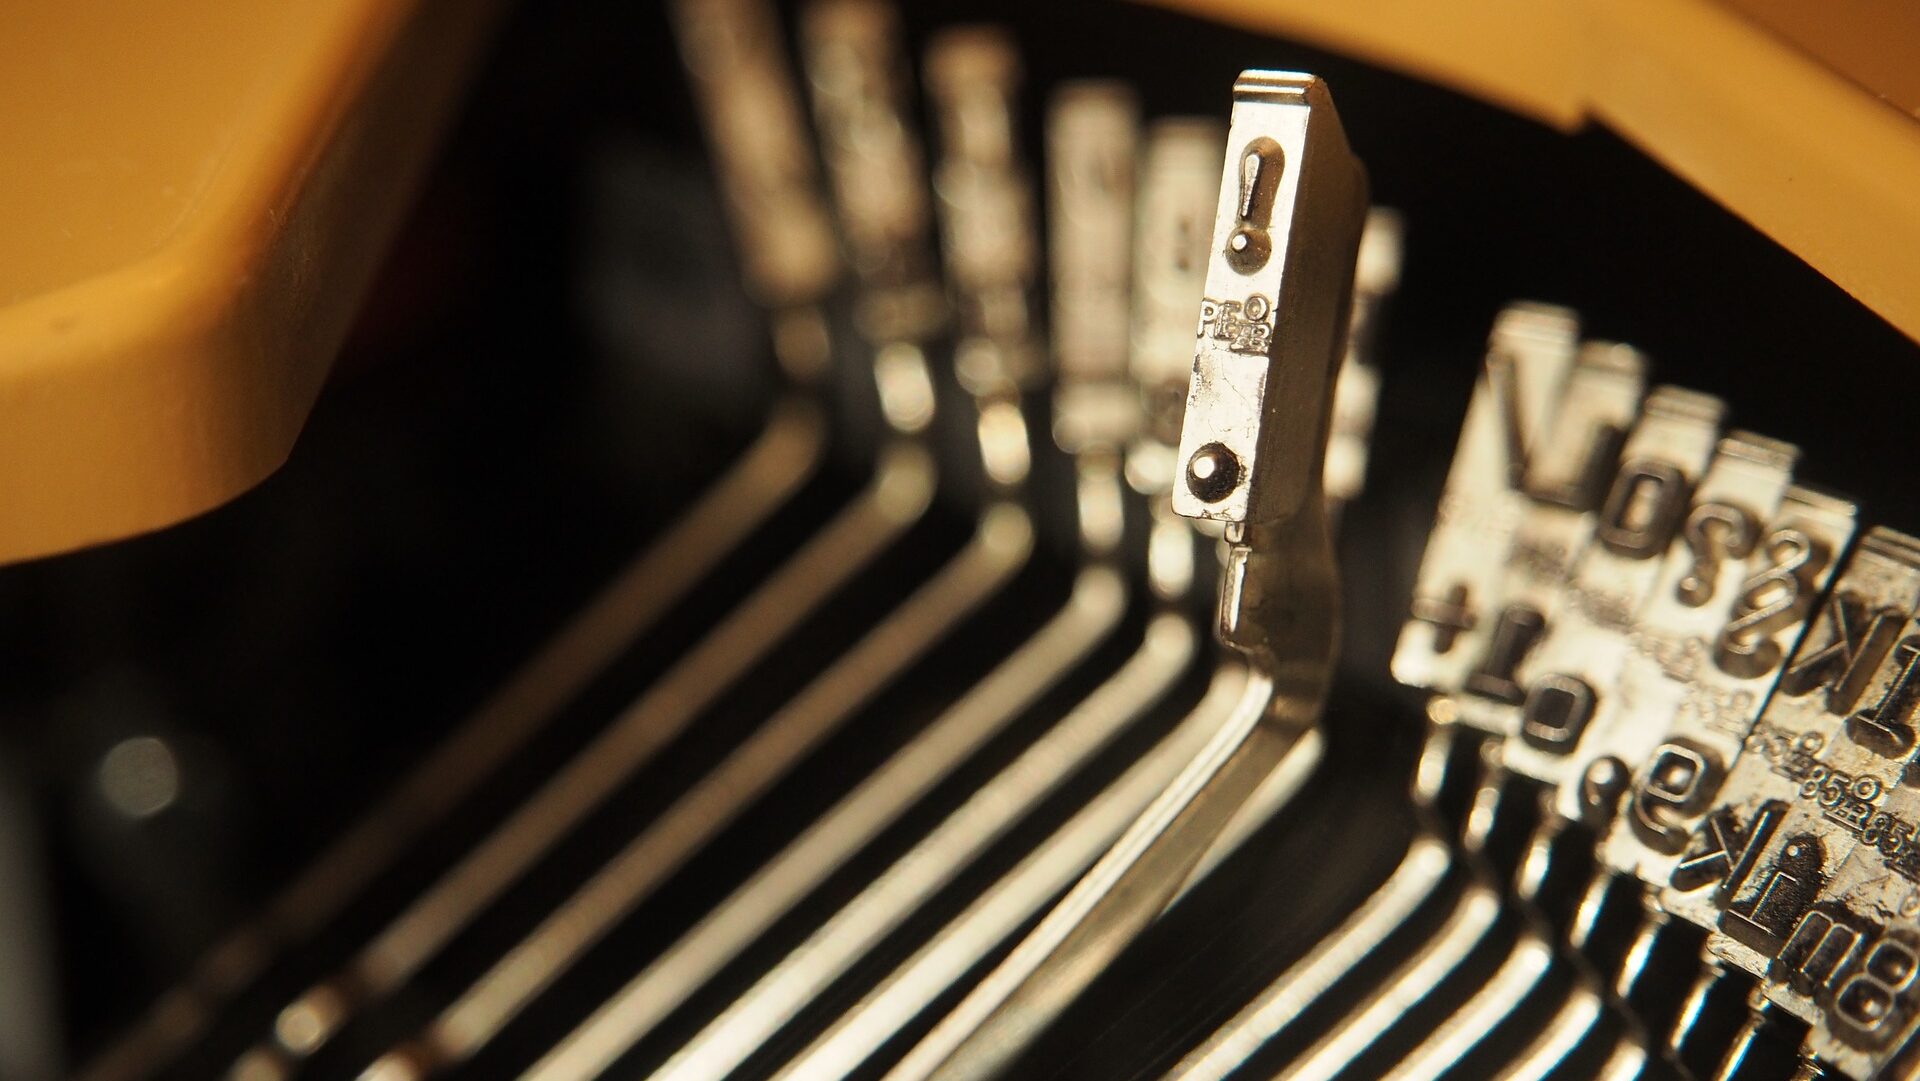
When Unix was first created, the standard way to talk to a computer was by connecting a terminal over a serial line. Brian Kernighan, a member of the Bell Labs team where Unix was created, wrote in his 2020 book Unix: A History and a Memoir that “Teletype Corporation was a part of AT&T, and Teletypes were widely used throughout the Bell System and elsewhere … for connecting to computers.” (p. 44) So it shouldn’t be too surprising that the Unix system, developed at Bell Labs by Ken Thompson and others, used Teletype terminals.
Teletype terminals printed text on a long roll of paper, fed into the back of the terminal. For every character generated by the computer, and every key pressed by the user, the terminal printed it on the paper. Serial lines were not fast connections, so the terminal didn’t need to be very fast to keep up with the line speeds. As Kernighan notes, the Bell Labs PDP-11 that ran an early version of Unix used a “Model 33 Teletype, a sturdy but slow and noisy device … that could only print in upper case, at 10 characters per second.” (p. 43)
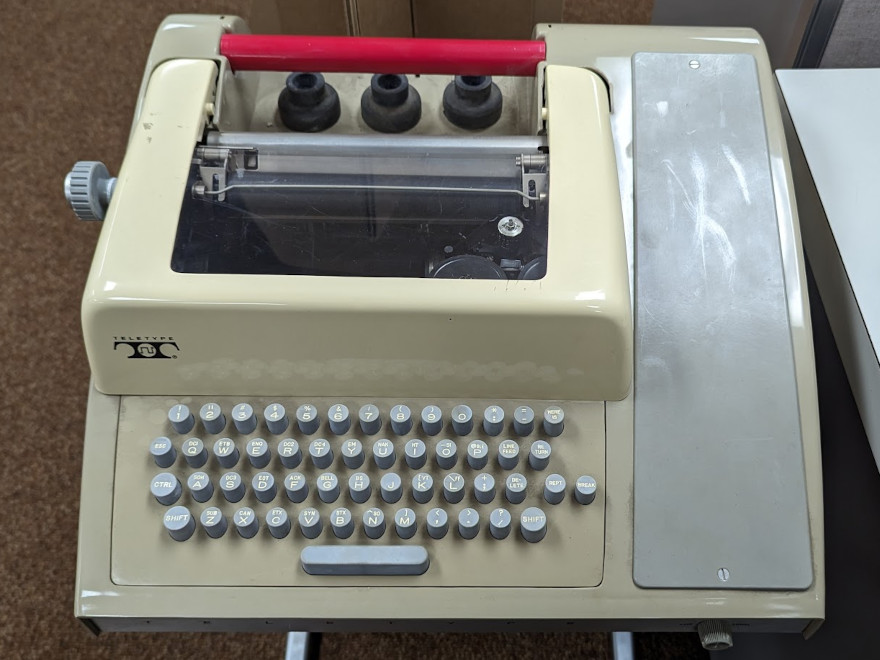
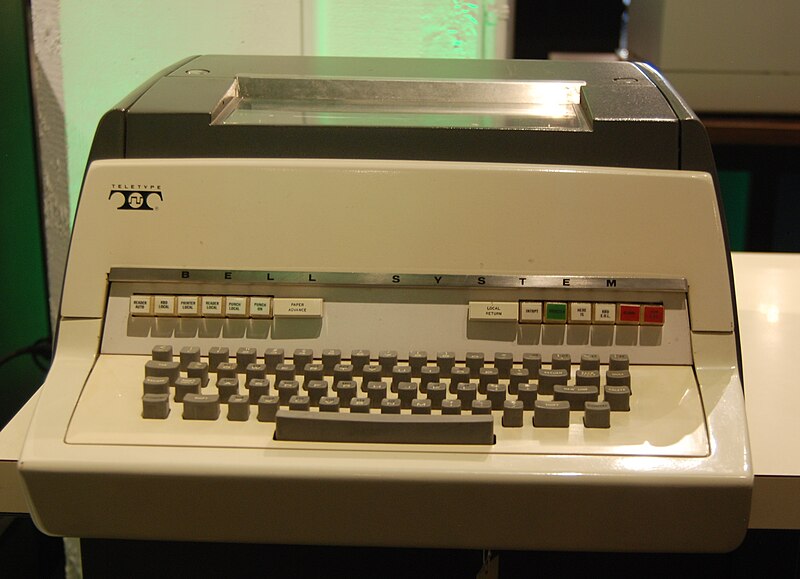
The Unix team later updated the terminals to the Teletype Model 37, which supported “lower case letters as well as upper case, and was somewhat faster (15 characters per second rather than 10).” (p. 45)
10 or 15 characters per second is agonizingly slow by today’s standards. Assuming one byte per character, and eight bits per byte, that’s 10 ✕ 8 = 80 bits per second (80 baud) for the Model 33, and 15 ✕ 8 = 120 bits per second (120 baud) for the Model 37. Let’s compare that to my Internet speed, which I tested at about 40 Mbps download and 25 Mbps upload. That’s 25 Mega bits per second, or about 25,000,000 bits per second.
As a very rough approximation, the ed editor was developed at a time when speeds were about 250,000 times slower. With such slow speeds, the editor was necessarily brief. Keep this in mind as you start to learn the basics of editing with ed.
Start a new file
Let’s start working on a new file with ed. To do this at the command line, give the name of the file to edit. If the file does not exist, GNU ed will print a message, but otherwise continue normally. I’ll start editing a new file called writing.md:
$ ed writing.md
writing.md: No such file or directory
It may look like ed has stopped working at this point, because it won’t print anything else, nor will it update the screen; that’s because ed is waiting for you to type something. By default, ed does not generate a prompt, because printing extra text like an editor prompt could be slow at 10 characters per second. Without a prompt, you essentially type commands “into the air.”
Type a to append lines to the empty file. GNU ed also accepts i to insert lines to the empty file. After either command, whatever you type will be added to the file. Enter . on a line by itself to stop. For this example, I’ll write a draft of an upcoming article about digital writing tools:
a
I have been thinking about early computer-based technical writing,
and the tools and technologies that were common at th time.
One early document markup system was `RUNOFF`, written by
Jerry Saltzer.
`RUNOFF` used "dot commands" at the start of a new line to provide
formatting in the document, such as `.ce` to center a line,
`.in` to set the text indentation, and so on.
This simple document markup provided a flexible foundation for
writing technical and professional documents iwth a computer.
.
Fixing errors in the text
As I wrote that paragraph, I realized I made two typos: “th” instead of “the,” and “iwth” instead of “with.” Let’s go back and fix these errors.
To search backwards for the “th” instance, use the ? editor command with the string you want to find. In this case, I want to find the line with “th time” on it, so I type ?th time. The editor prints the matching line, which becomes the new current line:
?th time
and the tools and technologies that were common at th time.
Let’s change “th time” to “the time” on this line. To do that, we use the s (substitute) command. The basic format of the s command looks like this:
s/oldtext/newtext/By default, the s command operates only on the current line. You can also give a set of lines for the s command to work on, such as from lines 10 to 20:
10,20s/oldtext/newtext/The s command will only change the first occurrence of the text on each line. If you need to act on all instances of the matching text, use the g (global) suffix:
10,20s/oldtext/newtext/gI’m using slashes because that’s usually how you’d write them. If your old text or new text has slashes in it, it might be easier to use a different character with the s command, such as exclamation points:
10,20s!oldtext!newtext!gBut to fix the “th” typo on the current line, we can use the basic format for the s command:
s/th time/the time/To verify the change, let’s print out the current line with the p (print) command:
p
and the tools and technologies that were common at the time.
Having made that edit, let’s also fix the other typo: “iwth” instead of “with.” We use the same process: search for the text, use s to substitute the text, then p to print the new line. But since “iwth” occurs after the typo we just fixed, we need to search forward in the file. To do that, we use the / editor command:
/iwth
writing technical and professional documents iwth a computer.
s/iwth/with/
p
writing technical and professional documents with a computer.
In GNU ed, searching forwards or backwards will “wrap” at the end or beginning of the file. So to search for “computer-based,” which occurs on line 1, we can also use the / command and ed will “wrap” the search if it can’t find the matching text by the end of the file, to continue the search from the start of the file:
/computer-based
I have been thinking about early computer-based technical writing,
Printing lines
We can use the p command to view more than just one line at a time. Just like the s command, you can give p a range of lines to print out, such as this to print just the first three lines:
1,3p
I have been thinking about early computer-based technical writing,
and the tools and technologies that were common at the time.
One early document markup system was `RUNOFF`, written by
If whitespace at the ends of lines is significant to your file, you can print $ as an end-of-line marker with the l (list) command instead:
1,3l
I have been thinking about early computer-based technical writing,$
and the tools and technologies that were common at the time.$
One early document markup system was `RUNOFF`, written by$
Or if you need a reminder about the line number for each entry, you can use the n (number) command. This prints the line number and a tab before each line:
1,3n
1       I have been thinking about early computer-based technical writing,
2       and the tools and technologies that were common at the time.
3       One early document markup system was `RUNOFF`, written by
One feature I like is using relative line numbers, to act on a certain number of lines above and below my current position. Let’s set the current line to the third line by searching for RUNOFF, then print the range starting at the line above (-1) and ending with the line below (+1):
/RUNOFF
One early document markup system was `RUNOFF`, written by
-1,+1n
2       and the tools and technologies that were common at the time.
3       One early document markup system was `RUNOFF`, written by
4       Jerry Saltzer.
The special character $ as a line number means the last line in the file, so you could print everything with the range 1,$ like this:
1,$p
I have been thinking about early computer-based technical writing,
and the tools and technologies that were common at the time.
One early document markup system was `RUNOFF`, written by
Jerry Saltzer.
`RUNOFF` used "dot commands" at the start of a new line to provide
formatting in the document, such as `.ce` to center a line,
`.in` to set the text indentation, and so on.
This simple document markup provided a flexible foundation for
writing technical and professional documents with a computer.
But if you’re going to print everything, you can also use the % special character, which means all lines:
%p
I have been thinking about early computer-based technical writing,
and the tools and technologies that were common at the time.
One early document markup system was `RUNOFF`, written by
Jerry Saltzer.
`RUNOFF` used "dot commands" at the start of a new line to provide
formatting in the document, such as `.ce` to center a line,
`.in` to set the text indentation, and so on.
This simple document markup provided a flexible foundation for
writing technical and professional documents with a computer.
Writing and rewriting text
Let’s keep working in our file. To append new lines, we can use the a (append) command with a line number. For example, to append new text after line 1, you could type 1a. In our case, we want to add new lines to the end of the file, so we can use $ as a line number, as $a:
$a

`RUNOFF` also inspired other document markup systems.
Doug McIlroy at Bell Labs wrote a similar markup system in the same
style, but using only abbreviated commands.
.
But I’m not entirely happy with how I’ve written that text. I think I can make that better by deleting this text and starting over. To remove lines from a file, use the d (delete) command. Since the current line is the last line that I entered, I can use -2,. to act on the range starting two lines above the current line, and ending on the current line; the . special character means the current line.
-2,.d
-2,.l
This simple document markup provided a flexible foundation for$
writing technical and professional documents with a computer.$
$
The -2,.l command says to print the range starting two lines above the current line, and ending on the current line, using $ to indicate the ends of each line. Since there’s a dollar sign on a line by itself, I know that line is blank.
Now let’s rewrite that paragraph, starting after the blank line at the end of my file:
$a
`RUNOFF` provided a simple yet flexible document markup system
that worked well to generate documents.
As a result, `RUNOFF` inspired other document preparation systems,
such as `roff` at Bell Labs, which generated output suitable
for a Teletype Model 37 terminal.
Later, Bell Labs made a new version called `nroff` (new roff)
that supported more complex formatting, and `troff` (typesetter roff)
that created output for a phototypesetter.
.
Before I finish working on this file, let’s add a title at the start of the document. We can use line numbers with either the a or i commands, so to insert a new line before the first line in the document, enter the 1i command and type the new text:
1i
# How we got to "now" in technical writing

.
That’s an okay title, but I can do better. Let’s change that line to write a new title. Since I need to rewrite the whole line, I can use the c command. Like the i and a commands, you need to enter . on a line by itself when you’re done adding new lines:
1c
# A brief history of technical writing tools
.
Save and quit
Having started this new document, entered a few lines, and edited the text, let’s call it a day. To save your file, use the w (write) command. This will write the file to disk using the filename you used to start the ed editor, and print the number of bytes written to the file:
w
986
With that confirmation that the file has been saved, we can safely exit with the q (quit) command, which will return us to the shell and our friendly $ shell prompt:
q
$
Back at the shell, we can use cat to view our file:
$ cat writing.md

# A brief history of technical writing tools

I have been thinking about early computer-based technical writing,
and the tools and technologies that were common at the time.
One early document markup system was `RUNOFF`, written by
Jerry Saltzer.
`RUNOFF` used "dot commands" at the start of a new line to provide
formatting in the document, such as `.ce` to center a line,
`.in` to set the text indentation, and so on.
This simple document markup provided a flexible foundation for
writing technical and professional documents with a computer.

`RUNOFF` provided a simple yet flexible document markup system
that worked well to generate documents.
As a result, `RUNOFF` inspired other document preparation systems,
such as `roff` at Bell Labs, which generated output suitable
for a Teletype Model 37 terminal.
Later, Bell Labs made a new version called `nroff` (new roff)
that supported more complex formatting, and `troff` (typesetter roff)
that created output for a phototypesetter.
Seeing it in action
Now that we’ve explored the basics of using ed to work in a text file, let’s see an entire ed editing session. With all that we’ve learned about ed, you should be able to follow along as I insert and append lines, search for text, and edit what I’ve written.
For this example, I’ll write a version of the Unix cat command, to display the contents of a text file. To keep it simple, this cat will read and write data one character at a time:
$ ed cat.c
cat.c: No such file or directory
a
#include <stdio.h>

int main(int argc, char **argv)
{
 FILE *pfile;

 for (i = 1; i < argc; i++) {
   pfile = fopen(argv[i], "r");
   if (pfile != NULL) {
     catfile(pfile, stdout);
     fclose(pfile);
   }
 }

 return 0;
}
.
?FILE
 FILE *pfile;
a
 int i;
.
1a

int catfile(FILE *in, FILE *out)
{
 int ch;

 while ((ch = fgetc(in)) != EOF) {
   fputc(ch, out);
 }
}
.
?^int
int catfile(FILE *in, FILE *out)
s/int/void/
w
354
q
Having created this simple version of the cat command, we can compile the program and run it to display the source code:
$ gcc -Wall -o cat cat.c
$ ./cat cat.c
#include <stdio.h>

void catfile(FILE *in, FILE *out)
{
 int ch;

 while ((ch = fgetc(in)) != EOF) {
   fputc(ch, out);
 }
}

int main(int argc, char **argv)
{
 FILE *pfile;
 int i;

 for (i = 1; i < argc; i++) {
   pfile = fopen(argv[i], "r");
   if (pfile != NULL) {
     catfile(pfile, stdout);
     fclose(pfile);
   }
 }

 return 0;
}
Getting started with ‘ed’
While it’s rare to use line editors today, I have a few use cases where ed is quite useful. For example, after entering a few commands to do something on a server, I might decide to turn that into a script. If I use a screen editor like vi to edit a new file, I can’t see the commands I just typed. But I can start ed and enter the commands into a script while I can still see the previous commands on my screen.
You can get pretty far in ed with the commands I’ve shown here to add lines to a file, search for text, update and edit text, append and insert new lines, save, and quit. But ed supports more than just these simple edit commands. If you want to learn more about how to use ed, check out the GNU ‘ed’ manual which you can read online in your web browser.

The opinions expressed on this website are those of each author, not of the author's employer or All Things Open/We Love Open Source.